This is the third of four videos showing how we built Astrid’s axe from How to Train Your Dragon: The Hidden World. In our last episode, we started adding the underlying details to the axe head and protected it using Worbla. We also added a dowel screw to the axe head so we could easily attach and detach the axe handle (to make it easier to ship). In this post, we’re going to add all the little details on the axe head and handle and get the prop ready for the final paint job.
Products & MaterialsCOSBOND PRODUCTS USED: CosBond Attach & Build |
Most of the work we’ve done so far has centered on preparing and protecting the axe head. In this episode, we’ll be working on the cosmetic details of both the axe head and the handle. It’s important to remember that there are a number of ways to accomplish the desired final look of any piece. Our approach worked for us because it allowed us to achieve the look we were going for while also helping us demonstrate how CosBond could help you build a prop in perhaps a different way than you’re used to. We’d love to hear how you might’ve done things differently or used any other techniques that helped you create your piece. So let’s get going.
STEP 1: Staining the Axe Handle and Adding the Hilt & Stop
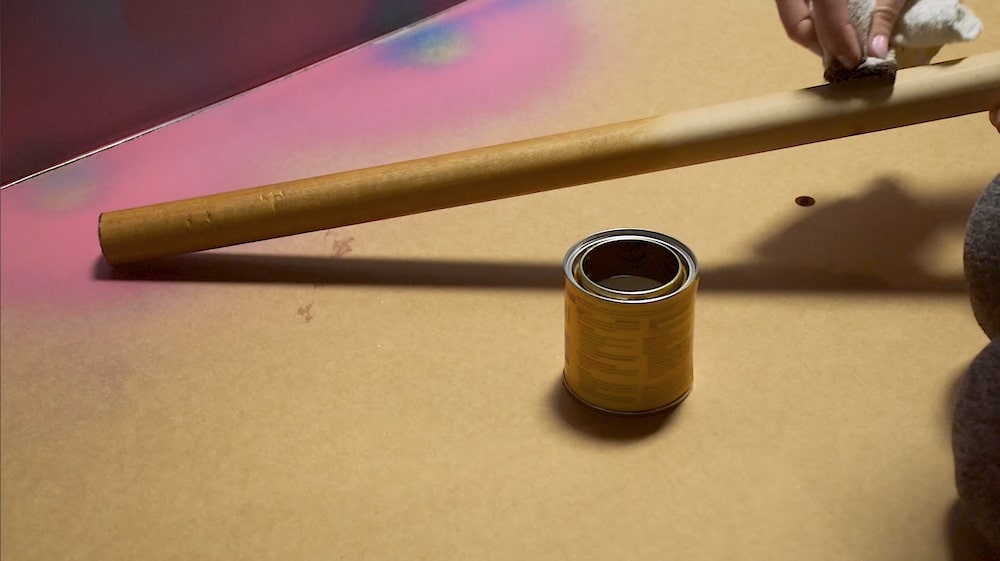
- Staining the handle was a relatively simple process that just required a little patience and time. We picked out a golden oak wood stain that we thought would look best and applied it with clean rag. We then wiped off the excess with another rag and repeated the process until we’d achieved the finish we wanted. It took about four coats total.
- Next, we turned our attention to the hilt. To create the hilt, we used Apoxie Sculpt which is a two-part compound that you mix together into putty and gives you the benefits of sculpting clay but also adheres to just about any surface like an epoxy. After mixing and sculpting the Apoxie Sculpt into the shape we wanted for the hilt, we used a little water to smooth out the surfaces and added the “eyes” of the dragon using the eraser end of a pencil. We then sculpted a couple of additional details that we would CosBond to the hilt after adding some of the strapping and fur (see below). Another cool thing about Apoxie Sculpt is that it self-hardens (no baking — takes about 24 hours) and it can be painted or stained after it cures, which allowed us to get the hammered look we wanted for the hilt.
- Since we had the Apoxie Sculpt out, we decided to work on the axe stop (the ball that sits above the axe head) next. To do this, we started by crumpling some aluminum foil into a ball and adding layers of aluminum foil until we had a ball approximately the size we wanted for the stop. We then mixed a little more Apoxie Sculpt and wrapped the foil ball until it was completely covered with Apoxie Sculpt. This gave us the hand-worn look that we wanted. Once the sculpt-covered foil ball had dried, we added a small piece of Worbla to the bottom so we could adhere it to the axe head and cut out a piece of CosBond Attach & Build about the same size as the piece of Worbla. We then heated the Worbla, peeled the release paper to adhere the CosBond to the Worbla, peeled the release paper on the other side of the CosBond, and pressed the stop onto the axe head. The combination of the CosBond and the self-adhesive nature of the Worbla gives the stop an incredibly strong hold as it sits atop the axe head.
 |
|
Check out our tips for adding nail or screw head details to your foam cosplay weapon. {{cta(‘756f7ce4-b082-44b0-bc94-a66e6ab6fd20’)}} |
Step 2: Adding the “Leather” Straps
One of the distinctive features of Astrid’s axe is the leather strapping on both the axe head and the handle. When we were considering how we would replicate these straps on our piece, we initially thought about using actual leather or faux leather. But these solutions can be pretty expensive, and they’re sometimes not the easiest materials to work with. One of the most challenging parts of working with leather is that the unfinished “back” side of the leather is difficult to adhere to different materials (even with CosBond) because the adhesive will tear off the sueded surface. And using vinyl is also tough because the plasticizers in many vinyls will actually degrade the “stickiness” of most adhesives (including CosBond) — it’s why it’s really tough to stick anything to a vinyl dashboard. So we decided to use 1/8″ thick EVA (craft) foam coated with Plasti-Dip as the combination gave us the look we wanted and was also easily accessible, relatively inexpensive, much lighter than leather, and very easy to work with particularly when adhering the straps to the various surfaces on the axe. Additionally, we could easily paint the Plasti-Dip-covered foam in different colors to mimic the various types of straps on the axe. Here’s how we took care of the straps.
- The first thing we did was cover a few sheets of 1/8″ EVA (craft) foam with CosBond Attach & Build — simply peeling and sticking until the entire surface was covered without removing the release paper on the opposite side. We then measured the width of our different straps. The straps on the axe handle were a little wider than the straps that would be used on the center of the axe head. We then cut the straps with scissors, cutting through the CosBond so each strap would have its own strip of the adhesive. Lastly, we gave all the straps a couple coats of Plasti-Dip to protect them and give them the “leathery” look that we were going for. Plasti-Dip is an aerosol rubber coating that protects items and remains flexible and stretchy over time (it won’t crack or become brittle). It comes in a bunch of colors but it’s also paintable, so it’s perfect for giving the straps the look we wanted.
- Since we’d taken the time earlier to add the CosBond Attach & Build to our foam, attaching the straps to the axe head and handle was a breeze. Each strap had its own peel and stick strip, so adhering the straps was as easy as, well, peel and stick . We made sure to overlap some of the straps on the axe handle to give them the authentic look we wanted and took a little time to measure where the straps on the axe head should be situated. Other than that, we were done with the straps, and the axe was really starting to come together.
STEP 3: Adding the “Nails,” Fur, and Hilt Details
With all the straps added to the axe, it was time to add the final details to the piece. Before doing so, we sprayed a couple of coats of Plasti-Dip to the entire axe head — giving the straps yet another coating and taping off the axe handle so we wouldn’t get any overspray on it. We also sprayed our hilt and the yet-to-be-attached details of our hilt with a couple of coats of grey Rust-Oleum Hammered spray paint to give it the look we wanted. We had to do this now as it would have been next to impossible to do after we added the fur. Here’s how the final details of the axe came together.
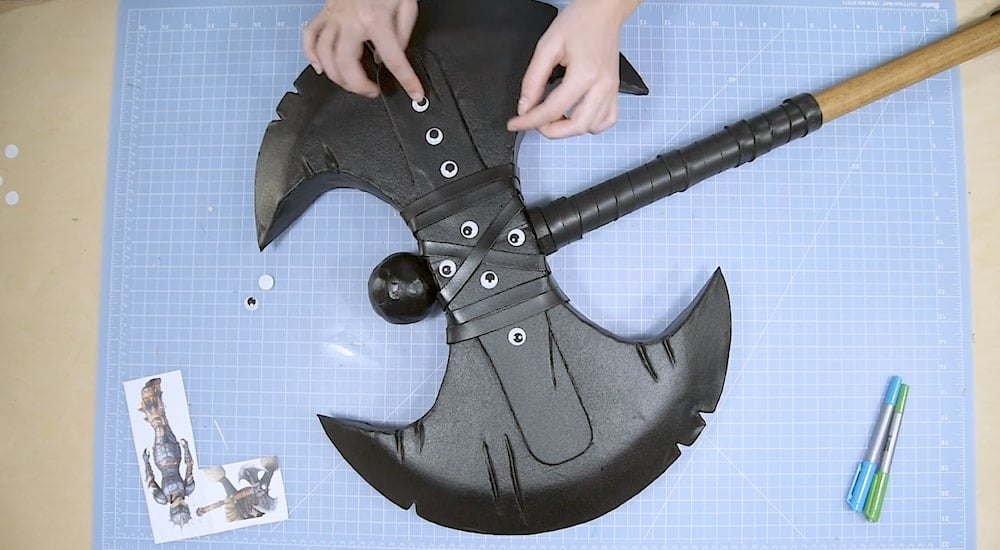
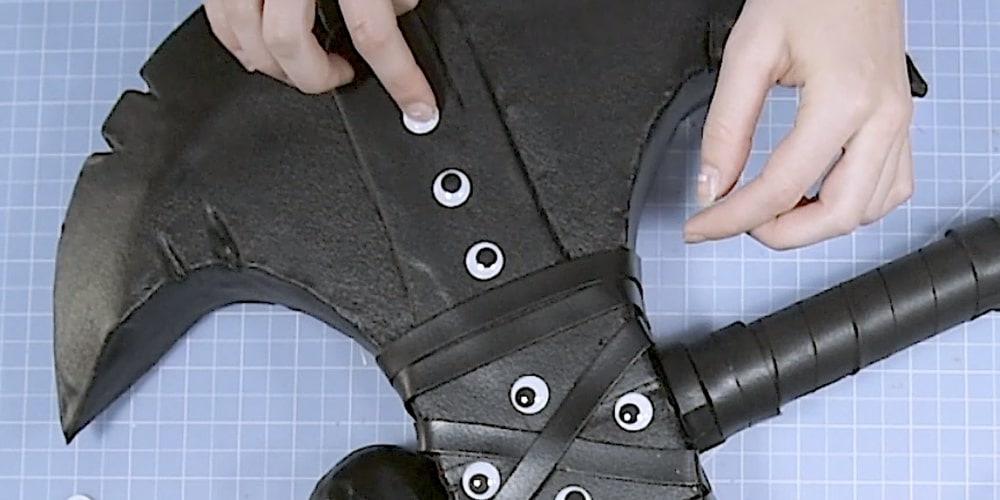
- With our axe head fully coated in Plasti-Dip, it was time to add the nail head details. To do this, we used the self-adhesive “googly eyes” that you find at any craft store. Since we were planning on adding another layer of Plasti-Dip, they would be fully coated and give us the look we wanted.
- Then it was time to add the fur details to the axe handle. To do this, we cut a few strips of faux fur to the width that we wanted, cut a few strips of CosBond Attach & Build to the same size, and applied the CosBond to the back of the fur strips. After that, applying the fur to the handle was as easy as peel and stick.
- Our last detail was to add the Apoxie Sculpt teeth that we’d created earlier to the hilt. To do this, we traced the teeth onto some CosBond Attach & Build, cut out the pieces we needed, and adhered them to the back side of each tooth. We then added them to the hilt, making sure there was good contact with the hilt itself and pushing aside some of the fur to accommodate the piece of the teeth that would overlap.