You’ve built your weapon out of foam. You’ve assembled all the pieces, sanded out the edges, sealed and painted your foam. Now it’s time for the final stage of cosplay prop building: weathering for the full effect. At this stage of the process, your weapon will stop looking like it’s made of foam and start looking like it’s actually something your character would use or carry. While careful planning and precise detailing have gotten you to this point, it’s time to get the look and feel right.
Whether you consider yourself someone with an eye for detail or not, weathering your foam cosplay weapon to give it the right look can be fun and satisfying after you figure out how to make your prop look like it’s been to battle, or over a thousand years old, or whatever else you need it to be. But what tricks should you have at your disposal to transform your weapon during this final step?
In this post, we’re going to describe the techniques for weathering foam cosplay weapons that we used in our Astrid’s axe build and explain why those details are so important for any prop project.
Adding Weathering and Dirtying It Up
Unless you’re building a weapon that is supposed to be in pristine condition or brand new to your character, weathering is a crucial step of the process that you shouldn’t skip. The vast majority of weapons will probably require at least some form of weathering to look authentic—like something your character has and will actually use. Adding signs of weathering, like paint that’s worn off of metal or caked-on dirt and rust, adds dimension and artistry to your prop. The weathering step of your process should take place after you seal your foam and paint your base colors.
You can think about weathering this way: it’s like your weapon has two layers, but you’re painting it in reverse; you lay down the outside layer first and then paint on the underneath color as if the top layer has rubbed off. This saves you the time and effort of actually painting both layers and doing any real weathering yourself (which could damage your foam).
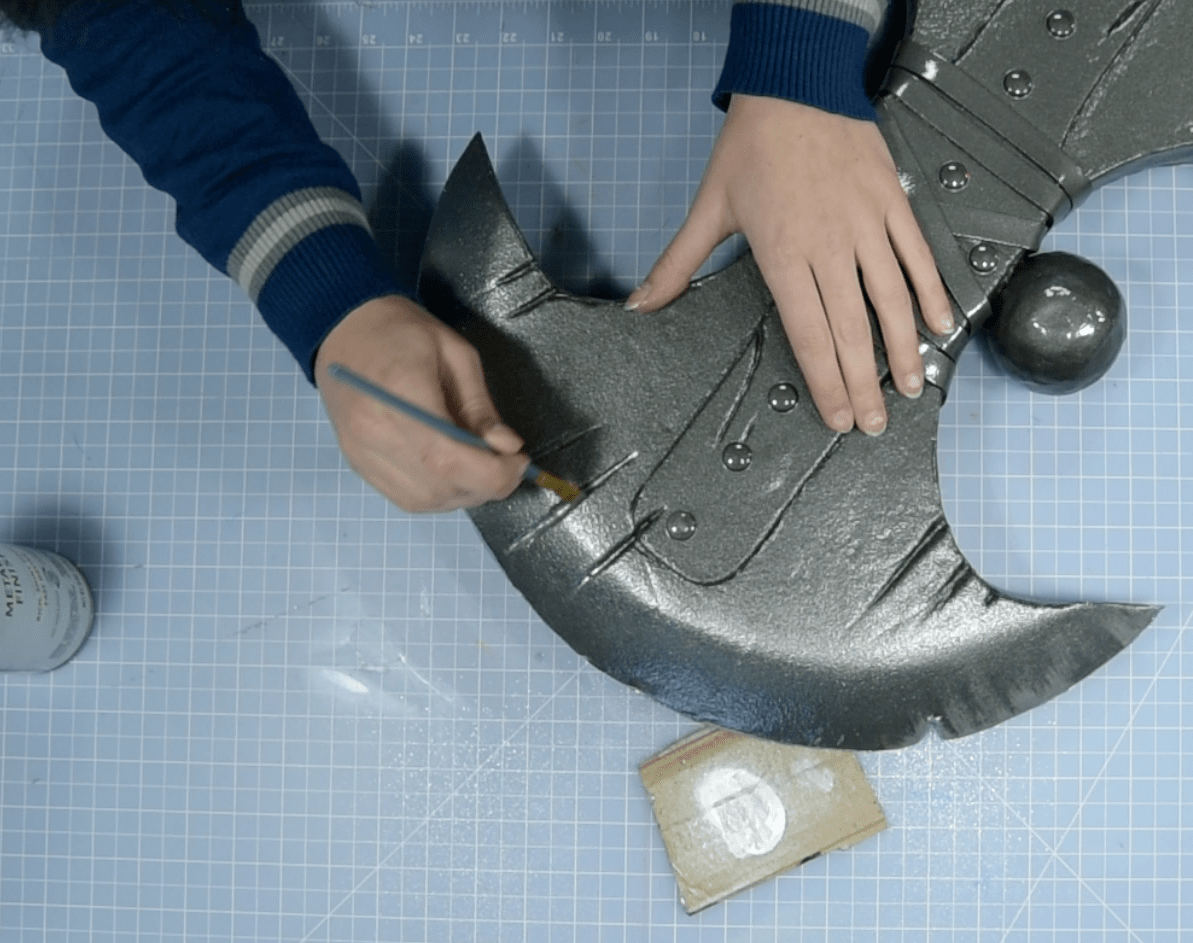
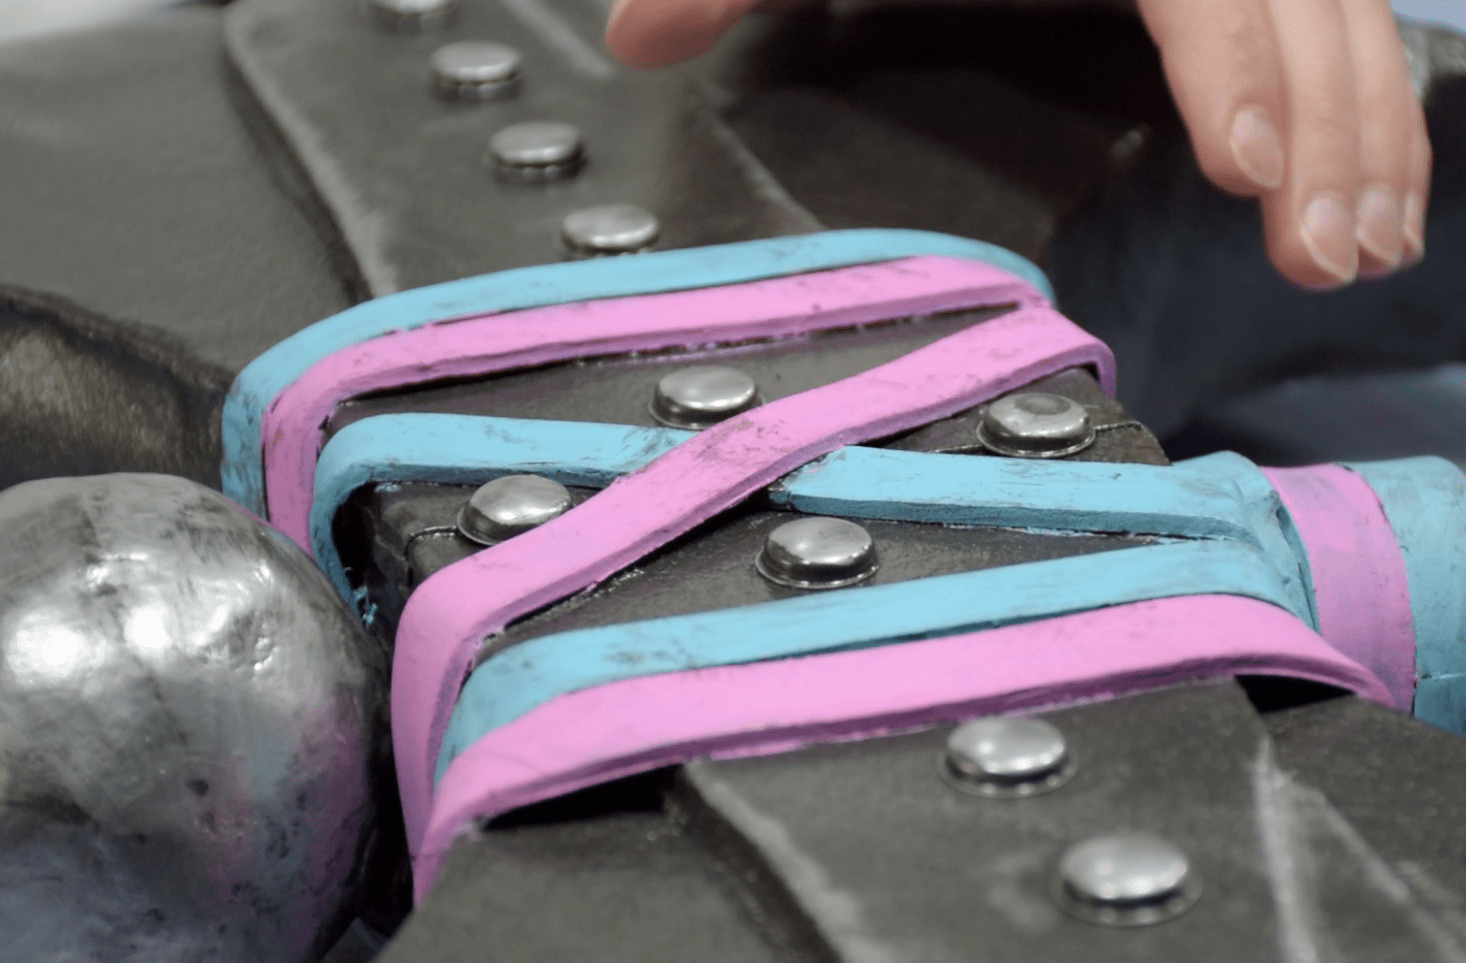
For our axe project, we wanted the blade to look like some of the paint/finish had worn off the metal using a silver dry-brush technique. We sprayed silver spray paint onto some cardboard and swiped it lightly over the edges of the blade where the paint would naturally wear down. Since we used spray paint, we knew it would ruin our brush, so we would recommend using cheap brushes that you won’t mind losing. You also don’t want to leave a solid block of color, just a natural wash that looks scratched and worn — so make sure you slowly build up damage until you’re satisfied. This type of weathering is best for high or raised points of your weapon where it would be rubbed often, and the sharp edge of the axe, sword, etc.
In order to get the most authentic look for your weapon, check out pictures of your character with their weapon to see where weathering occurs and think logically about what parts of the weapon would naturally wear down over time. Adding random scratches or weathering won’t look as true to character or even true to reality. For blades, like Astrid’s axe, the most noticeable weathering would occur on the edge of the blade that would come into contact with whatever Astrid might be hacking or slicing. That’s where the majority of wear and tear would naturally show on her axe. However, this can vary slightly depending on the prop. If your weapon has a metal handle, for example, think about where someone’s hands would rub off the finish and put some silver there too.
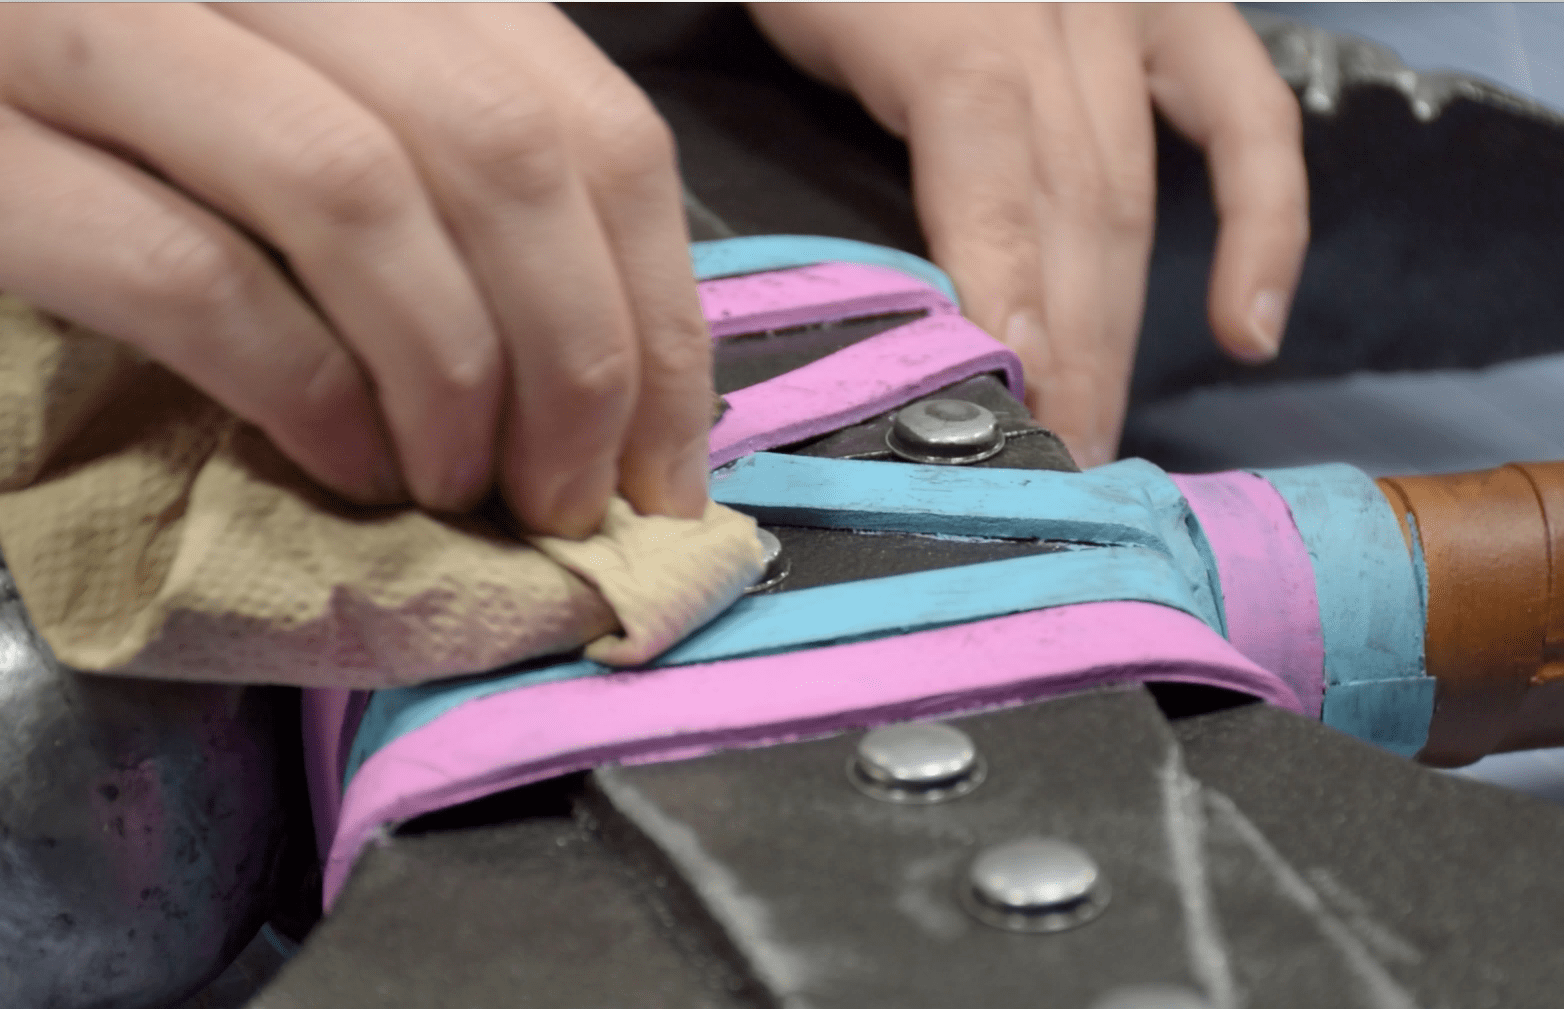
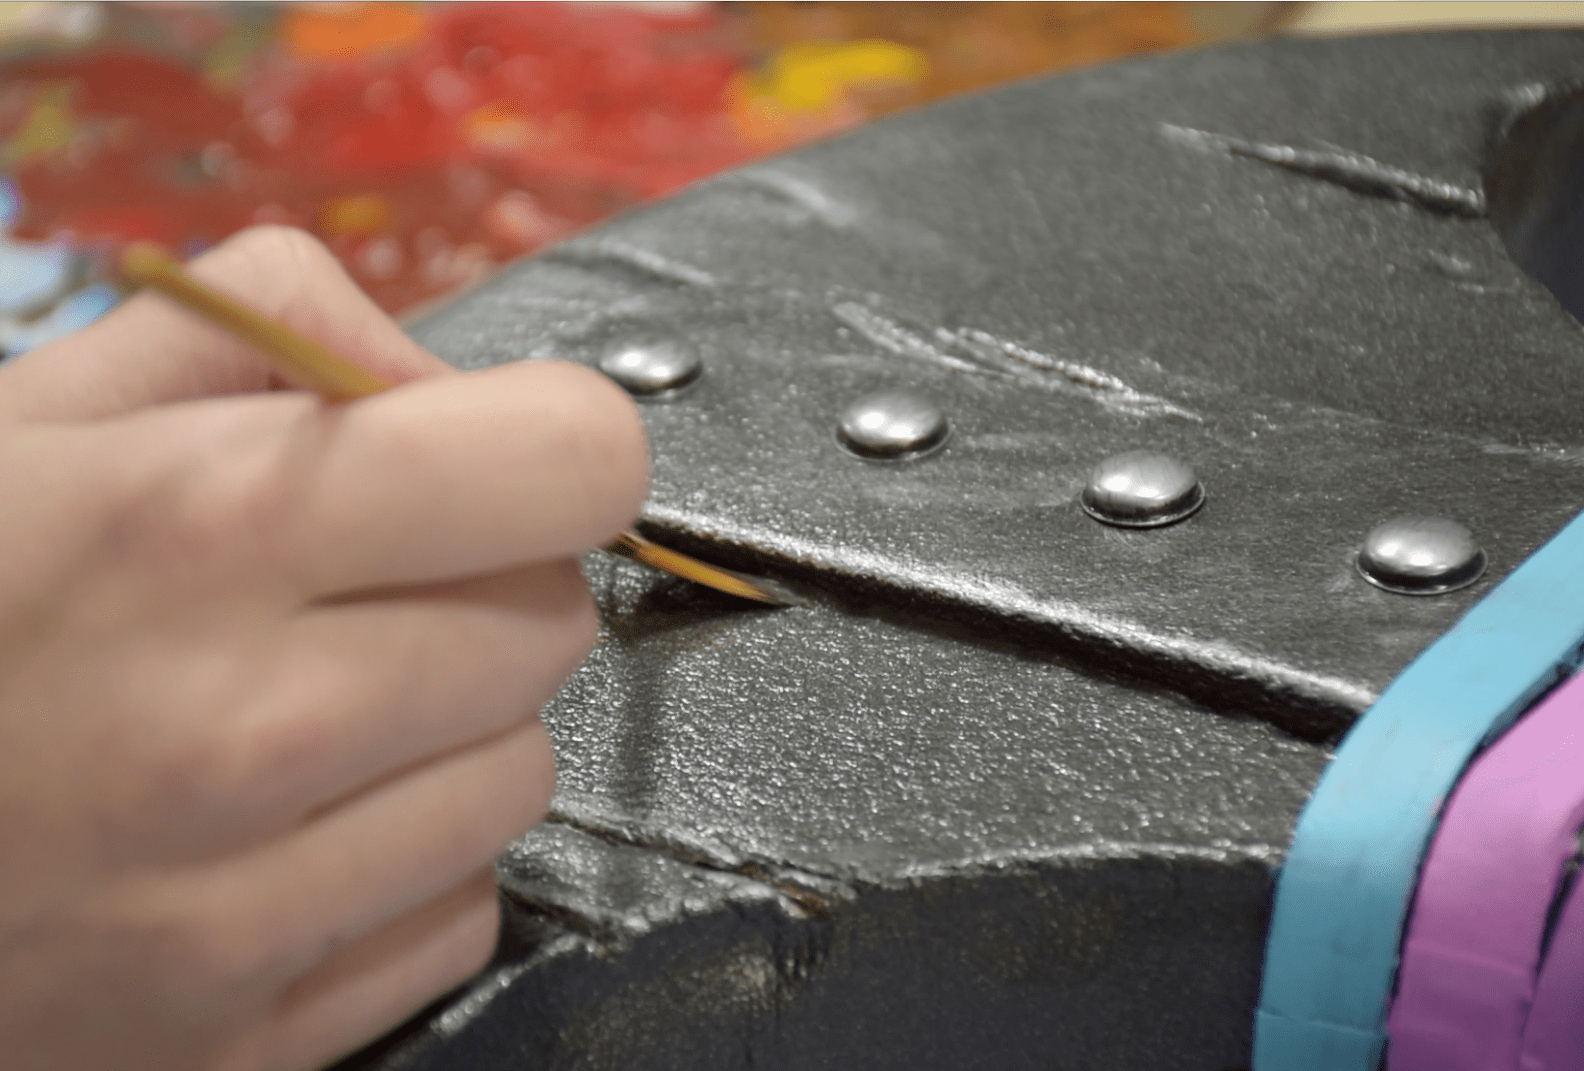
In addition to using silver paint for metal weathering, we also used a mixture of black and brown acrylic paints to make our axe look like it had a believable amount of dirt in its low points and crevices. Once your foam is sealed with a rubberized paint and your base layers of paint are dry, dip a small brush in water and a black or another dark color of paint (that matches the environment your character would be fighting in — black for volcanic ash or green for swamp scum, for example). Smudge the paint into the cracks and crevices of your weapon (like places you carved out while soldering or where the hilt attaches). Doing small sections at a time, rub the dark paint in with your brush, then wipe most of it away with a paper towel before it dries. You can build up the color and “dirtiness” by taking multiple passes over the same area with this technique. As the paint settles down into the cracks and lightly stains your prop, it’ll give off an authentic “dirty” look. You can do as little or as much as you like, but it’s best to go slow so you don’t accidentally overdo it.
Just like with the silver process, you should consider just where dirt or debris would naturally collect on your weapon and how clean or dirty your character would keep it. Certain characters might use a weapon that’s a lot newer or more pristine than others. Warriors would probably clean their weapons to a certain degree, but not until they’re shining like new. It’s a good rule of thumb that most dirt would accumulate along seams and ridges in indented areas of a weapon. Again, random splotches of weathering won’t make much logical sense and will detract from the overall look and feel of your cosplay. Always check out pictures of your character and use them as a guide for your weapon when in doubt.
Adding the Finishing Touches to Your Prop
When you think of the cosplays that impress you the most, what sets them apart from the rest? While ambitious character choices and high-tech elements are certainly some of the most exciting parts of any cosplay, it’s often the accuracy and attention to detail that really brings the character to life. This goes for both the costume itself as well as the props and weapons that round out the cosplay. In order to create the most authentic and believable cosplay weapons you can, putting on the finishing touches with weathering can really make an impact.
Of course, every cosplay is different, and we’ve only listed a few weathering techniques in this post. But beyond what we used to make Astrid’s axe look like the real deal, there are tons of ways to add more dimension to your foam props using paint, dremels, and more. That’s part of the beauty of crafting weapons with foam: it’s a workable material that you can paint, sand, carve, and build on until it looks the way you want. Insulation foam was our material of choice for Astrid’s axe because with a little practice, it’s great for mimicking the look of other materials like wood, metal, and more.
And while there’s plenty of advice out there to read and watch for weathering inspiration, sometimes the best way to master a technique is to get creative and try new ideas out for yourself. Testing different tools, products, and materials on scrap foam is a great way to find out how to achieve different effects and textures that you can use on your current and future cosplays. All it takes is a little practice and a little imagination.