This is the fourth of four videos showing how we built Astrid’s axe from How to Train Your Dragon: The Hidden World. In our last episode, we added all the details to the axe head and the handle. In this episode, we’re going to finish the axe with a final paint job including details to give depth, dimension, and “weathering.”
Products & MaterialsCOSBOND PRODUCTS USED: no CosBond products were used in this step |
Up until now, we’ve only painted certain pieces of the axe where it made sense — namely the hilt and the stain on the handle. Each of those pieces were either easier to install after being painted or there were other components in the way that would make it difficult to paint after installation, like the fur by the hilt of the axe. For this final paint job, we’ll be using both spray paint and acrylics to get to the look we want. As you’ll see in this tutorial, the previous steps we took to get the axe ready — the Worbla, the Plasti-Dip coating, making the straps out of foam, etc. — will make this final step so much easier. As with all of these tutorials, it’s important to remember that there are a number of ways to accomplish the desired final look of any piece. We’d love to hear how you might’ve done things differently or used any other techniques that helped you create your piece. So let’s get going.
STEP 1: Painting the “Metal”
- Painting the metal was a relatively simple process but required a little artistry. We first sprayed all the “metal” pieces on the axe head with Rust-Oleum Painter’s Touch 2X Ultra Cover Paint & Primer Hammered Spray Paint in grey. This is where being able to remove the axe head from the handle was awesome for us as we could spray freely (even on the underside of the axe head) without having to worry about any overspray getting onto the handle. Anyway, this particular paint gave us the dark silver finish that we wanted for the base of the axe head. Also, it’s a paint that adheres to plastic, so we knew it would give us excellent coverage over the Plasti-Dip and the little googly eyes that would become the nail/screw heads. When using any spray paint, it’s important to be patient and think in terms of applying several light coats. Even though you’re SO close to being done with the piece, you really have to resist the urge to spray heavily to get it done quicker as the results will simply not be as good. For us, it took four coats to get the coverage we wanted. Also, remember to spray in a well-ventilated room so the fumes don’t build up.
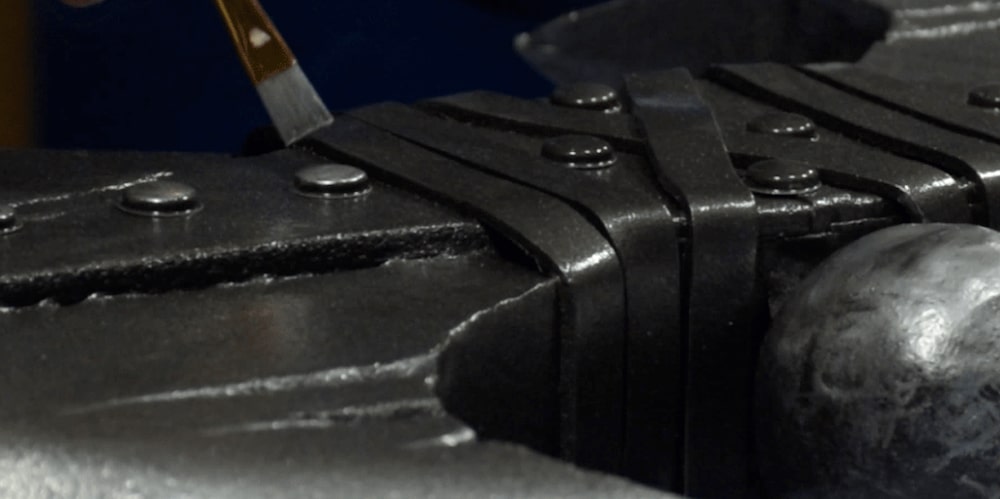
- Next, we used the same Rust-Oleum Painter’s Touch Spray Paint — this time in silver — to add some of the highlights to the axe head. We first sprayed a couple of coats on the sides of the axe head where it bevels down to form the “sharp” edges. We then sprayed some of the paint onto a piece of cardboard so we could brush it onto the high points of the axe. When doing this, you want to think of the spots on the axe where there is damage and where the surface of a real axe might rub on something. For us, this included the stop atop the axe head, the nail heads, and some of the edges. This is where you let your creativity and artistic sensibilities take over and add the details as you see them. For us, it was important to not be too heavy-handed as we simply wanted to add realism to the piece.
 |
|
Check out our blog post on weathering foam cosplay weapons for more tips and techniques to give realism to your piece. {{cta(‘294b63d7-253e-4a03-b7eb-ca35651d8eb5’)}} |
Step 2: Painting the “Leather” Straps
One of the distinctive features of Astrid’s axe is the leather strapping on both the axe head and the handle. We’re not exactly sure why some of the straps are pink and blue and some are more of a “natural” leather color, but this presented an interesting challenge when determining how to create these straps. We discussed in our previous episode why we went the route of foam instead of leather or vinyl for these straps (less expensive, easier to work with, easier to adhere, etc.), but one of the big advantages of the foam was that we could easily paint it in different colors to mimic the various types of straps on the axe. It’s not that leather or vinyl can’t be painted; it’s just that the alternatives for painting these materials can get more expensive and more complicated. For us, it simply wasn’t worth the additional hassle when we knew our foam-leather straps would turn out great. So here’s how we painted the straps to make them look more real.
- Painting the straps was very easy. Since we’d already painted the straps and/or covered them with Plasti-Dip, we could use an acrylic paint for these details. Acrylic paints are great for these applications as they provide a wide range of colors, they can be mixed to give you even more color options, and there are no fumes to worry about. The one thing you want to make sure of when using any paint is to not mix brands as the chemicals each brand uses may not react well when mixed with others. We used both Liquitex Heavy Body Acrylic Paint and the Liquitex Basics Acrylic Paint as they are readily available and a great quality for the price. We brushed on multiple coats of blue, pink, and brown according to our reference photos until we had the look we wanted. We then went back to the brown straps and lightly brushed on some darker brown accents to give the straps more dimension, wiping off the excess with a paper towel until we achieved the look we were going for. Again, let your creativity and artistic sensibilities guide you with these details without getting heavy-handed.
STEP 3: Adding the “Dirt”
With all the painting essentially done, it was time to add the final bit of “realism” to the piece by weathering with the dirt and grime that Astrid’s axe would accumulate over time. Here’s how these final details came together.
- To add the “dirt” to our axe head, we mixed a bit of brown and black acrylic paint and lightly brushed it into the gashes and other weapon damage. We also worked it into any of the joints on the axe head surface — again, use your artistic sense to imagine where dirt may accumulate. After each application, we used a paper towel to wipe off the excess paint to achieve the look we wanted.